- A. Cockburn, "Characterizing People as Non-Linear, First Order Components in Software Development", 1999
- A. Cockburn, "Agile Software Development: The Cooperative Game, 2nd Edition", 2006.
- M. Cohn, "The Ideal Agile Workspace", 2009
- D. Hartman, "Designing Collaborative Spaces for Productivity", 2007
- J. D. Meier, "Microsoft patterns & practices Agile Workspace Tour", 2009
- J. Pierce, "Great Agile Workspaces: The Physical Environment", 2011
- J. Pierce, "Great Agile Workspaces: How We Communicate", 2011
- J. Sutherland, G. Schoonheim, N. Kumar, V. Pandey, and S. Vishal, "Fully Distributed Scrum: Linear Scalability of Production between San Francisco and India", 2009
- S. Teasley, L. Covi, M. S. Krishnan, and J. S. Olson, "How Does Radical Collocation Help a Team Succeed?", 2000
- A. Williams Woolley, C. F. Chabris, A. Pentland, N. Hashmi, and T. W. Malone, "Evidence for a Collective Intelligence Factor in the Performance of Human Groups", 2010
Thursday, April 26, 2012
People Spaces Reading List
Tomorrow afternoon I will be giving a talk on creating productive, team-based workspaces at the SWOC PMI Symposium 2012. Below is a list of the reading materials that I think reflect the principles of what I will talk about. This is by no means an exhaustive reading list but it goes provide a flavour and supports some of the claims that I make in my talk.


Monday, March 19, 2012
How-to: Use an external display with an iPad (UPDATE)
In a previous article I
described how to get your iPad to display on a screen or projector.
The most promising method was to use an Apple TV device to receive your
iPad screen output. However, because the Apple TV does not support WPA2 enterprise, the
type of wireless security most often used at corporations and university campuses, this option was off the table for those who might want to most use it. It occurred to me after writing the original article
that one way to get around this limitation is to create your own
wireless network using a portable router like Apple's Airport Express or
the Asus WL-330N3G.
At a high level, here's what you need to do.

Once the components are configured you can just plug everything in before you start a meeting or a class and you can wander around presenting your content from your iPad. Here's what it'll cost you (Canadian $):
At a high level, here's what you need to do.
- Configure the Airport Express to create your own wireless network ("Air Lecture", for example). I recommend configuring wireless security as well so select WPA2 (Personal) and enter a password that you will remember. Now whenever you plug the AirPort express into a wall socket it will create the "Air Lecture" wireless network.
- The Apple TV and iPad should now see the "Air Lecture" wireless network. Configure both devices to join "Air Lecture" entering your wireless security password in each device.
- Now that both the Apple TV and the iPad are on the same wireless network you can use AirPlay (as described previously) to display your video-enabled app or your entire iPad interface (depending on the type of iPad you have).

Once the components are configured you can just plug everything in before you start a meeting or a class and you can wander around presenting your content from your iPad. Here's what it'll cost you (Canadian $):
- Apple iPad 16M Wifi base model - $519
- Airport Express - $99
- Apple TV - $109
Tuesday, March 6, 2012
100 Days Experiment
Starting March 7th between 4-4:30pm Eastern I'm going to begin an experiment on Twitter. Every day for 100 days straight I'm going to tweet a Leonard Cohen song lyric. Not just any lyric will do though. There must be rules for this kind of thing.
The Rules
The Rules
- Duration: 100 days straight (no gaps)
- Timing: tweets will be sent around the same time every day
- Focus: same songwriter (no intermixing songwriters)
- Writers only: doesn't matter who performs the song
- No titles: lyric cannot contain the song title or any significant words from the song title
- Significance: lyric should have some poetic, lyrical, political, or social significance
- Simplicity: lyric is presented by itself without commentary, quotes, or other affectations
- Accurate: lyric is presented exactly as the writer wrote it without paraphrasing or tweet hacking
- Hashtagged: only allowable embellishment is the hashtag of #100daysofcohen
- Retweetable: maximum length of tweet including hashtag should be around 125 so that it can be easily retweeted
- Breadth: As much as possible the collection should cover the breadth of the songwriter's career rather than just one period
Thursday, January 26, 2012
How-to: Use an external display with an iPad, iPhone, or iPod Touch
Quick Bite: Apple provides a number of ways to export iPad, iPhone, and iPod Touch video, audio and graphics to external displays like a television or projector. Full user interface mirroring is only possible using iPad 2 and iPhone 4S devices. Mobile warriors generally will invest in an Apple TV 2 or an inexpensive remote control app. Two major caveats: Full mirroring presents a security challenge as your password will be presented on the external display. And Apple TV 2 may not support the type of wifi security you use in a typical campus or office setting.
Being the head of IT for a major business school, I often get asked by professors and instructors how they can make use of their iPad to display classroom content on a projector or screen. Unless you're trapped behind a lectern or podium you need a lightweight, portable tool for displaying presentation materials. Tablet computers like Apple's iPad are ideally suited for the mobile presenters providing there is a way to export the iPad display to a monitor or projector. In this article I will cover the different ways to display content from your iPad, iPhone or iPod Touch (collectively known as iOS devices).
Mirroring vs Video Output
First, it is important to understand the differences between "mirroring" and "video-enabled apps". Mirroring refers to the ability to display the entire iOS interface on an external display. This includes not only the output of apps like Keynote or Videos but also Email, iCal, websites and even the app springboard itself (as illustrated here on the right). Mirroring is supported only with the iPad 2 and iPhone 4S. These devices output up to 1080p resolution and 720p for video. Please note that when mirroring ALL of the user interface is displayed to the screen including the virtual keyboard and the keys you are pressing even if those keys are typing out your password. If you are going to enter a password then turn off mirroring first by using one of the methods described below.
All other iOS devices, including the original iPad, iPod Touch (2nd gen and up), and iPhone 3GS and up support video output only for video-enabled apps. Video-enabled apps are apps that have been specifically designed to output to an external display. The built-in Videos and YouTube apps, for example, can output video and audio. The iOS version of Keynote supports exporting its presentation display (it exports nothing while editing). These older iOS devices will output up to 720p (which is the resolution used in the new building classrooms). Even older devices like the original iPhone and earlier iPods can output video and audio only using a Composite Video Adaptor.
Video Adaptors
Apple and 3rd party vendors produce an array of adaptors that can be used to output iOS device displays. These adaptors all feature a standard Apple 30-pin doc connector on one end and a standard video connector on the other allowing you to connect video cables to your iOS device.
Regardless of the adaptor used, if you are expecting to wander freely around the classroom or boardroom projecting content from your iPad then none of the above solutions are for you. All of these solutions leave your device tethered to a video cable. In the next section I'll describe two options for untethered presentation of content.
Remote Control Apps
If your iOS device needs to be tethered why not control it via a remote control app on your iPhone or iPod Touch. This method can be used to control an iPad or a Mac. It's not the most elegant solution and remote control apps are usually limited to controlling only one kind of application. For instance, the Apple Remote app can be used to control iTunes for playback of audio or video (Tango Remote is similar). Apple Keynote Remote can be used to control Keynote on a Mac or iOS device. 2Screens has its own remote. And so on... A more general way to control a Mac or PC is via a VNC app running on your iOS device but that is beyond the scope of this article.
Apple TV 2
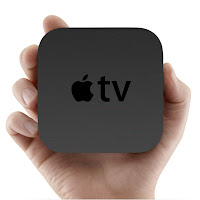 By far the most elegant solution for displaying your iOS device content is using an Apple TV 2 device. Or it would be the most attractive if not for one frustrating flaw that Apple has not yet addressed (more on that in a moment).
Along with the introduction of the $99 (CDN$120) Apple TV 2 in September 2010, Apple introduced a feature called AirPlay which enabled the Apple TV 2 to serve as an output display for an iPad 2 or an iPhone 4S without any video or audio cables. This enabled device mirroring as if a digital display adaptor is connected to your device.
 Once you are set up and on the same wifi network, your iOS devices will automatically detect the presence of an available Apple TV. Video-enabled apps like Videos and YouTube will display an AirPlay icon (see right) when an Apple TV device is detected. Touch the icon and select the Apple TV device from the list to export the iOS display to the Apple TV. The AirPlay icon will then turn blue. Touch the AirPlay icon again to disable the external display (say, if you want to enter a password). This method works for any iOS device that supports video-enabled apps or full mirroring.
The other AirPlay method, available only for iPad 2 and iPhone 4S devices, enables full device mirroring. To do this, double-press the home button to display the multi-tasking bar and then swipe right. You should see something similar to the illustration below. The AirPlay icon will be displayed whenever an Apple TV 2 device is detected. Touch the AirPlay icon to enable full mirroring of the iPad 2 or iPhone 4S display. This will mirror all aspects of the display to the Apple TV device regardless of whether or not the app is video-enabled.
Note that the iOS device and the Apple TV 2 need to be on the same wifi network for this to work. This is where it all breaks down for use in many corporate or campus settings. At this time Apple TV 2 does not support WPA2 Enterprise encryption. Most well run corporate and campus wireless networks use this more robust type of wireless encryption. If you run a small, single subnet network (like a home network) then you might be ok. Regardless, lack of WPA2 Enterprise support on Apple TV is a huge oversight by Apple. Especially considering that Apple TV 2 runs iOS and all other iOS devices support this encryption method.
Being the head of IT for a major business school, I often get asked by professors and instructors how they can make use of their iPad to display classroom content on a projector or screen. Unless you're trapped behind a lectern or podium you need a lightweight, portable tool for displaying presentation materials. Tablet computers like Apple's iPad are ideally suited for the mobile presenters providing there is a way to export the iPad display to a monitor or projector. In this article I will cover the different ways to display content from your iPad, iPhone or iPod Touch (collectively known as iOS devices).
Mirroring vs Video Output
 |
| Mirrored Springboard |
All other iOS devices, including the original iPad, iPod Touch (2nd gen and up), and iPhone 3GS and up support video output only for video-enabled apps. Video-enabled apps are apps that have been specifically designed to output to an external display. The built-in Videos and YouTube apps, for example, can output video and audio. The iOS version of Keynote supports exporting its presentation display (it exports nothing while editing). These older iOS devices will output up to 720p (which is the resolution used in the new building classrooms). Even older devices like the original iPhone and earlier iPods can output video and audio only using a Composite Video Adaptor.
Video Adaptors
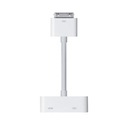
Apple and 3rd party vendors produce an array of adaptors that can be used to output iOS device displays. These adaptors all feature a standard Apple 30-pin doc connector on one end and a standard video connector on the other allowing you to connect video cables to your iOS device.
 |
| Digital Display Adaptor |
Digital Display (HDMI) Adaptor
If you can guarantee that the displays or projectors you will be using support HDMI then this is definitely the adaptor to purchase. It supports full mirroring for iPad 2 and iPhone 4S devices and supports output for video-enabled apps on older devices. The one connector will carry both video and audio from the iOS device to the display.
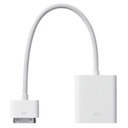
VGA Adaptor
If you can't guarantee that you'll always have an HDMI capable display then I recommend getting a VGA adaptor instead. VGA has been around far longer than HDMI and is almost always supported. You can still mirror your iPad 2 and iPhone 4S user interfaces and output the display for video-enabled apps on other devices. You'll need to use a stereo audio cable if audio is required.
Component/Composite Adaptor
You can also purchase adaptors for more traditional television displays including composite and analog HD component video. Almost all Apple devices, including legacy devices like the iPod Nano, are supported but you can only export audio, video and picture slideshows using this adaptor.
VGA Adaptor
 |
| VGA Adaptor |
If you can't guarantee that you'll always have an HDMI capable display then I recommend getting a VGA adaptor instead. VGA has been around far longer than HDMI and is almost always supported. You can still mirror your iPad 2 and iPhone 4S user interfaces and output the display for video-enabled apps on other devices. You'll need to use a stereo audio cable if audio is required.
Component/Composite Adaptor
You can also purchase adaptors for more traditional television displays including composite and analog HD component video. Almost all Apple devices, including legacy devices like the iPod Nano, are supported but you can only export audio, video and picture slideshows using this adaptor.
Regardless of the adaptor used, if you are expecting to wander freely around the classroom or boardroom projecting content from your iPad then none of the above solutions are for you. All of these solutions leave your device tethered to a video cable. In the next section I'll describe two options for untethered presentation of content.
Remote Control Apps
If your iOS device needs to be tethered why not control it via a remote control app on your iPhone or iPod Touch. This method can be used to control an iPad or a Mac. It's not the most elegant solution and remote control apps are usually limited to controlling only one kind of application. For instance, the Apple Remote app can be used to control iTunes for playback of audio or video (Tango Remote is similar). Apple Keynote Remote can be used to control Keynote on a Mac or iOS device. 2Screens has its own remote. And so on... A more general way to control a Mac or PC is via a VNC app running on your iOS device but that is beyond the scope of this article.
Apple TV 2

Along with the introduction of the $99 (CDN$120) Apple TV 2 in September 2010, Apple introduced a feature called AirPlay which enabled the Apple TV 2 to serve as an output display for an iPad 2 or an iPhone 4S without any video or audio cables. This enabled device mirroring as if a digital display adaptor is connected to your device.
To use AirPlay ensure that your Apple TV and iOS devices have the latest versions of software. You'll need iOS 4.3 or later on your iPad (1 or 2), iPhone 3GS or later, or iPod Touch 2nd gen or later. You'll also need Apple TV 4.2 or later on your Apple TV. If you routinely install updates when notified by Apple then you will be fine.
 |
| Enabling Mirroring |
Note that the iOS device and the Apple TV 2 need to be on the same wifi network for this to work. This is where it all breaks down for use in many corporate or campus settings. At this time Apple TV 2 does not support WPA2 Enterprise encryption. Most well run corporate and campus wireless networks use this more robust type of wireless encryption. If you run a small, single subnet network (like a home network) then you might be ok. Regardless, lack of WPA2 Enterprise support on Apple TV is a huge oversight by Apple. Especially considering that Apple TV 2 runs iOS and all other iOS devices support this encryption method.
I hate to end on a bummer note but that's it. I've contacted Apple about this but they are characteristically tight lipped about when or even if this will be addressed. Given Apple's recent embrace of education technology I'm hoping that they fill this easy-to-fix hole.
Thursday, January 12, 2012
Agile Reading List
Tonight I will be giving a talk to our local PMI chapter about what it takes to succeed in Agile. This gave me an opportunity to gather and hone some of my thoughts regarding what I've been referring to as "Whole Agile". Below is a list of reading materials that I think together reflect all of the aspects (and not just practices) of what it takes to succeed at Agile. This is by no means an exhaustive list of books on Agile Methodology that I recommend but rather it is mean to cover all aspects of Whole Agile.
- Augustine, Sanjiv and Cuellar, Roland. "The Lean-Agile PMO", Cutter Consortium Executive Report, Vol. 7, No. 10, 2006.
- Cockburn, Alistair. Agile Software Development: The Cooperative Game, Addison-Wesley Professional, 2006.
- Cohn, Mike. Agile Estimating and Planning, Prentice Hall, 2005.
- Highsmith, Jim. Agile Project Management: Creating Innovative Products, Addison-Wesley Professional, 2009.
- Martin, Angela, Noble, James and Biddle, Robert. "Programmers are from Mars, Customers are from Venus: A practical guide for customers on XP Projects", 2006.
- Poppendieck, Mary and Poppendieck, Tom. Lean Software Development: An Agile Toolkit, Addison-Wesley Professional, 2003
- Rooney, Dave. "An Organizational Structure for Agile Projects", Cutter Consortium Executive Report, Vol. 8, No. 5, 2007.
Tuesday, August 9, 2011
How to revive Mac App Store when its stuck forever waiting...
I recently went to the App Store application on my Mac to download the Lion version of Apple's Xcode development tools. I was prompted for my Apple ID and password (which I provided) and then I left the App Store app on its own to complete the download and install. After about 30 minutes I went to check in on its progress and saw that it had downloaded exactly 0 bytes. The status on the Purchased page was Waiting...
Solution 1: Kill the Zombie
The App Store uses a process called "storeagent" that runs continuously in the background. It seems that sometimes this process can go a little wonky and fail to respond to requests to download app purchases. What we want to do is kill this zombie process (it will start up again automatically).
First, quit the App Store application (e.g. by selecting "App Store->Quit App Store" or pressing Cmd-Q or click the red dot in the top left corner of the window). Start up Activity Monitor (you'll find it on Lion's launchpad in the Utilities collection or using Finder in Applications/Utilities/Activity Monitor. Activity monitor is used to display the processes running on your Mac. You could go hunt around for the process called "storeagent" but an easier method is to enter "storeagent" in the Activity Monitor filter box as illustrated below (some of the numbers will be different). Highlight the "storeagent" process by clicking on it. The "Quit Process" stop sign should become available. Go ahead and click on Quit Process to kill "storeagent". You'll be asked if you really want to quit the process. Confirm by clicking "Quit". Normally this should do the trick and the process will disappear immediately and be replaced a little while later by a new process (with a different number in the PID column). However, if the process is a deep zombie, you will need to click "Force Quit" in the confirmation dialog. Do this only as a last resort as it is possible to damage system files by using Force Quit too often.
 |
| Waiting for Godot |
...and waiting and waiting. I quit and restarted App Store and still my downloads were stuck waiting. I dug around a little and it turns out this is not an uncommon problem but the remedies suggested were all over the place. Everything from installing updates and deleting caches (both good ideas) to deleting your Library folder (not a good idea). I like to attack problems like this by starting with the easiest and least invasive measures.
I should state right off the bat that these solutions are meant to incur as little disruption as possible but do require the use of some programs that might not be in your usual repertoire: Activity Monitor and Terminal. If you are at all uncomfortable using these tools you can always use that old Windows chestnut... reboot. Yes, rebooting your Mac should have the same affect as solution 1 at least. But if you don't want the hassle of rebooting then read on.
I should state right off the bat that these solutions are meant to incur as little disruption as possible but do require the use of some programs that might not be in your usual repertoire: Activity Monitor and Terminal. If you are at all uncomfortable using these tools you can always use that old Windows chestnut... reboot. Yes, rebooting your Mac should have the same affect as solution 1 at least. But if you don't want the hassle of rebooting then read on.
Solution 1: Kill the Zombie
The App Store uses a process called "storeagent" that runs continuously in the background. It seems that sometimes this process can go a little wonky and fail to respond to requests to download app purchases. What we want to do is kill this zombie process (it will start up again automatically).
 |
| Start Activity Monitor |
 |
| Activity Monitor Filtered for "storeagent". Note the "Quit Process" stop sign is now clickable. |
Now go ahead and restart the App Store application. Click on Purchased, find your purchase and select Resume. After you enter your Apple ID and password your purchase should start downloading. However, if the App Store is still stuck in Waiting move on to Solution 2.
Solution 2 - Purge the Caches
Solution 1 has always worked for me but I've heard of cases where more intervention is required. If this fits your situation then go ahead and quit the App Store application again. Now we do some typing into Terminal. You can find Terminal in the same Utilities folder that you found Activity Monitor. When you start it, it should look something like below.
What we're going to do is use some commands to delete App Store caches. You do not need to worry about deleting these files since, by definition, they are a copy of what is already stored on the Apple servers and will automatically be restored. Type of the following commands exactly as you see below (in fact, go ahead and copy and paste them into Terminal).
Now go and do the steps in Solution 1 again. Once you're done that, start up App Store, go to Purchases, and select Resume on your download. Enter your Apple ID and password and you're off to the races.
Solution 2 - Purge the Caches
Solution 1 has always worked for me but I've heard of cases where more intervention is required. If this fits your situation then go ahead and quit the App Store application again. Now we do some typing into Terminal. You can find Terminal in the same Utilities folder that you found Activity Monitor. When you start it, it should look something like below.
 |
| At the Terminal prompt |
rm -r ~/Library/Caches/com.apple.appstore
rm -r ~/Library/Caches/com.apple.storeagent
rm ~/Library/Preferences/com.apple.appstore.plist
rm ~/Library/Preferences/com.apple.storeagent.plist
rm ~/Library/Cookies/com.apple.appstore.plist
Now go and do the steps in Solution 1 again. Once you're done that, start up App Store, go to Purchases, and select Resume on your download. Enter your Apple ID and password and you're off to the races.
Sunday, August 7, 2011
Ruby Koan for Dice Scoring (Greed) - Solution #2
It's interesting what some sleep and exercise can do. The next day while approaching the "big hill" part of my run I came up with a new solution to the Greed Ruby Koan. This solution is shorter and is more Rubyesque (I think). It also includes a reasonable amount of error checking (nil parameter and valid dice values). Again, I'd love to hear from Ruby enthusiasts to comment on style and other approaches.
def score(dice)

  return 0 if dice == nil

  score  = 0
  counts = [0, 0, 0, 0, 0, 0]
  dice.each { |roll| counts[roll-1] += 1 if (1..6) === roll } # Count valid rolls

  (1..6).each { |i| score += (i == 1) ? 1000 : i * 100 if counts[i-1] >= 3 } # Score triples

  # Score the rest
  score += counts[0] % 3 * 100
  score += counts[4] % 3 * 50

  return score
end
Friday, August 5, 2011
Ruby Koan for Dice Scoring (Greed) - Solution #1
Recently I've started teaching myself Ruby and as part of my quest I discovered the amazing Ruby Koan site by EdgeCase. The concept of a koan dates back to the foundations of Zen Buddhism. You might recognize the question "what is the sound of one hand clapping". This is actually part of a Zen koan. A koan is a question or story that serves as a fundamental teaching tool. A traditional Zen koan cannot be understood via rational thought but rather through intuition leading to an "Aha!" moment.
Ruby Koans, as developed by EdgeCase, consist of 274 test cases and incomplete Ruby code. Your task is to implement the code in order to make all the tests pass in classic TDD style. For those unfamiliar with the term, TDD means Test Driven Development. TDD follows the pattern of red, green, refactor. When implementing a new section of code you start with its tests which will all fail (be 'red') initially. Then you implement the code turning all of the tests green. Finally, and over time, you go forth with confidence and refactor the code to higher and higher levels of quality (keeping it green).
Many of the Ruby Koan tests are fairly simple to make pass. Some of the more esoteric Ruby features were more difficult to master (I thought Array.inject and blocks/yield would drive me to murder). However, one of the most interesting koan related to scoring dice throws in a fictional game called Greed. This koan is quite different than the others and is more like a Kata (a martial arts term referring to a repetitive exercise meant to hone skill -- I'll save Kata for another post). Briefly, the koan asks you to implement a class that conforms to the following requirements:
This particular koan consists of 13 (initially failing) tests. Your implementation of the scoring method must make them all pass. Ruby, by its nature, provides a multitude of ways (more than any other language I think) to solve this problem. What follows is my first attempt. It should be noted that error checking was excluded from the requirements nor did any of the tests include input error tests (like dice rolls outside 1..6, strings, etc.).
As a student of Ruby I am keen for feedback (particularly from the Ruby masters) as this solution seems a little... wordy.
Ruby Koans, as developed by EdgeCase, consist of 274 test cases and incomplete Ruby code. Your task is to implement the code in order to make all the tests pass in classic TDD style. For those unfamiliar with the term, TDD means Test Driven Development. TDD follows the pattern of red, green, refactor. When implementing a new section of code you start with its tests which will all fail (be 'red') initially. Then you implement the code turning all of the tests green. Finally, and over time, you go forth with confidence and refactor the code to higher and higher levels of quality (keeping it green).
Many of the Ruby Koan tests are fairly simple to make pass. Some of the more esoteric Ruby features were more difficult to master (I thought Array.inject and blocks/yield would drive me to murder). However, one of the most interesting koan related to scoring dice throws in a fictional game called Greed. This koan is quite different than the others and is more like a Kata (a martial arts term referring to a repetitive exercise meant to hone skill -- I'll save Kata for another post). Briefly, the koan asks you to implement a class that conforms to the following requirements:
# A greed roll is scored as follows [for a roll of up to 5 dice]:
#
# * A set of three ones is 1000 points
#
# * A set of three numbers (other than ones) is worth 100 times the
#   number. (e.g. three fives is 500 points).
#
# * A one (that is not part of a set of three) is worth 100 points.
#
# * A five (that is not part of a set of three) is worth 50 points.
#
# * Everything else is worth 0 points.
#
# Examples:
#
# score([1,1,1,5,1]) => 1150 points
# score([2,3,4,6,2]) => 0 points
# score([3,4,5,3,3]) => 350 points
# score([1,5,1,2,4]) => 250 points
This particular koan consists of 13 (initially failing) tests. Your implementation of the scoring method must make them all pass. Ruby, by its nature, provides a multitude of ways (more than any other language I think) to solve this problem. What follows is my first attempt. It should be noted that error checking was excluded from the requirements nor did any of the tests include input error tests (like dice rolls outside 1..6, strings, etc.).
As a student of Ruby I am keen for feedback (particularly from the Ruby masters) as this solution seems a little... wordy.
def score(dice)
  score = 0
  sorted_dice = dice.sort # Sort the rolls

  while sorted_dice.length > 0
    val = sorted_dice.shift
    if sorted_dice.length >= 2 && val == sorted_dice[0] && val == sorted_dice[1]  # a triple!
      score += val == 1 ? 1000 : val * 100
      sorted_dice.shift(2)
    else
      score += 100 if val == 1
      score += 50  if val == 5
    end
  end

  return score
end
Thursday, July 28, 2011
Agile Software Development - Why?
I recently guest-published an article on the blog hosted by Big Blue Bubble, the award developer of handheld video games. If you're interested in learning about why Agile software development is valuable and what benefits you might derive from it, head over to Big Blue Bubble's Out of the Blue.
Thursday, July 21, 2011
Mac OS/X Lion, "Reverse" Scrolling, and Chrome
Up until yesterday's release of Mac OS/X Lion, the user interface metaphor for scrolling was that you manipulated the scrollbar on the side or bottom of your content (say a webpage). So in order to scroll content upwards you swiped, wheeled, or otherwise moved down. To scroll your content downwards you moved up. This is a very computer-sciency method of scrolling in that the container had a dohicky (the scrollbar) that you touched to scroll.
Tablets and smartphones have flipped the metaphor on its head. With a modern touch interface you manipulate the content directly. If you want the content to scroll up off the top of your tablet you swipe it up. To scroll the content down off the bottom of your tablet you swipe down. All very natural.
One of the major themes of Apple's Lion release is the harmonizing of the touch and desktop interfaces including a change to how desktop scrolling works. This change is immediately apparent when you load content in Safari. First, there are no scrollbars. Second, you swipe, wheel or otherwise move up in order to move your content up. Apple calls this "natural scrolling". This is initially disconcerting for most users since they've spent most of their computer lives doing the opposite. You can configure Lion to do it "the old way" but I really encourage you to give it a chance. In about 10 minutes (or nearly instantly if you're using a trackpad) your brain accepts the change and things settle down to normal. Natural scrolling really feels natural.
In order for applications to behave correctly in Lion they do need to be updated. This will take some time depending on the application's complexity and the ability of its owner to turn around change. Google, for example, is actively modifying Chrome in order to provide the best Lion experience. However, until they do, Chrome will act a little odd in Lion. For example, it enters full screen mode quite nicely but it isn't immediately apparent how to exit it (see "How to exit full screen mode in Mac OS/X Lion (when you're stuck)" for more on this topic).
 Another inconsistency is that the scrollbars are persistent rather than Lion transient. Rather than waiting for Google to release a new version of Chrome for Lion you can get rid of those pesky, pixel hogging scrollbars now by using one of the scrollbar-remover extensions available on the Chrome web store. I'm currently testing Scrollbar Hide by Saúl Pilatowsky. By default it only hides the vertical scrollbar but you can configure it to hide both. You can also configure it such that the scrollbars are either permanently disabled or appear "when needed" (basically when the mouse pointer roams close to the right or bottom edges). Another option is No Scrollbar by Bestrafer which simply hides the vertical scrollbar. For both extensions you may need to restart Chrome for the scroll bars to stay gone. After that, you can take a tiny step closer to the full Lion experience.
Tablets and smartphones have flipped the metaphor on its head. With a modern touch interface you manipulate the content directly. If you want the content to scroll up off the top of your tablet you swipe it up. To scroll the content down off the bottom of your tablet you swipe down. All very natural.
One of the major themes of Apple's Lion release is the harmonizing of the touch and desktop interfaces including a change to how desktop scrolling works. This change is immediately apparent when you load content in Safari. First, there are no scrollbars. Second, you swipe, wheel or otherwise move up in order to move your content up. Apple calls this "natural scrolling". This is initially disconcerting for most users since they've spent most of their computer lives doing the opposite. You can configure Lion to do it "the old way" but I really encourage you to give it a chance. In about 10 minutes (or nearly instantly if you're using a trackpad) your brain accepts the change and things settle down to normal. Natural scrolling really feels natural.
In order for applications to behave correctly in Lion they do need to be updated. This will take some time depending on the application's complexity and the ability of its owner to turn around change. Google, for example, is actively modifying Chrome in order to provide the best Lion experience. However, until they do, Chrome will act a little odd in Lion. For example, it enters full screen mode quite nicely but it isn't immediately apparent how to exit it (see "How to exit full screen mode in Mac OS/X Lion (when you're stuck)" for more on this topic).
Another inconsistency is that the scrollbars are persistent rather than Lion transient. Rather than waiting for Google to release a new version of Chrome for Lion you can get rid of those pesky, pixel hogging scrollbars now by using one of the scrollbar-remover extensions available on the Chrome web store. I'm currently testing Scrollbar Hide by Saúl Pilatowsky. By default it only hides the vertical scrollbar but you can configure it to hide both. You can also configure it such that the scrollbars are either permanently disabled or appear "when needed" (basically when the mouse pointer roams close to the right or bottom edges). Another option is No Scrollbar by Bestrafer which simply hides the vertical scrollbar. For both extensions you may need to restart Chrome for the scroll bars to stay gone. After that, you can take a tiny step closer to the full Lion experience.
Wednesday, July 20, 2011
How to exit full screen mode in Mac OSX Lion (when you're stuck)
 I've been playing around with Lion, Apple's new version of Mac OS/X. In general I really like the new features and will very soon be purchasing a Magic Trackpad to go with my iMac.
 One feature that I can see myself using (if only to help me focus) is full screen applications. Apple added a little icon in the top right corner to all windows that allows you to make the app full screen. For applications that are full screen aware (like the new version of Mail) you just hit Escape or CMD-Shift-F and you go back to the windowed mode. However, for some reason, once you put Terminal in full screen mode it stays there for good. Even after you exit and unload the app (e.g. with CMD-q) and then restart. Neither Escape nor CMD-Shift-F seem to work to reverse the full screen process. Eventually I stumbled on the fact that when you move the mouse pointer up past the top of the screen, the menu bar appears (it may take a second). The menu bar now includes a new icon for reversing full screen mode. Hurray!

Friday, July 1, 2011
What's on your Pod (Update)
Recently I completed an intense three week management course called the Ivey Executive Program (small plug for my employer) where I met many amazingly talented people. During the first week of the course my iPad was a source of interest for many that had never used one before. By the second week at least four shiny new iPad 2s were in class with more on order. I found myself making app suggestions daily and pointing people to my blog where, about a year ago, I posted What's on your Pod? Since the time of the original article I have, naturally, discovered many other apps that I use weekly and even daily. It's high time for an update.
As with the last article, I've divided the apps up into three categories: apps on my iPad, apps on my iPhone, and apps that I use on both. Let's start with the apps I use on both my iPhone and my iPad.
iPhone/iPod

Cases
I thought I'd throw in a special mention for some iPad cases that I've taken a shining to as well. First is the DODOcase that I have for my original iPad. Thanks to Ken Drouillard for giving me this hand-me-down after he upgraded to an iPad 2. This case never fails to get commented on once people realize that there's an iPad inside what looks like a regular black hardcover notebook. The bamboo construction is light, sturdy, beautiful and pro-eco.
The second case I'll mention is a wooden iPad 2 case by Miniot. This gorgeous cover uses the same magnetic mechanism used by Apple's smart covers. The instant-on feature even works with it. When I eventually move on to an iPad 2 (or 3) this will likely be the cover I get. Again, a big thanks to Ken for discovering this one.

As always, if you have apps that you think are fantastic I really want to know about them. Please comment!
As with the last article, I've divided the apps up into three categories: apps on my iPad, apps on my iPhone, and apps that I use on both. Let's start with the apps I use on both my iPhone and my iPad.
Both (iPhone and iPad)
- Twitter (Free) - I still use this app to view my Twitter feed but Flipboard (keep reading) has become my app of choice of consuming nearly all of my social and news feeds.
- Tumblr (Free) - You might think Tumblr is just another blog site like Blogger/Blogspot and you wouldn't be wrong. However, Tumblr kills as a photo blog and that's exactly what I use it for. All the blogs I follow on Tumblr are photo blogs (including my daughter's).
- Instapaper (Free) - Have you ever been in the situation where you just discovered a really interesting article but you just doing have the time to read it right now? Services like Instapaper and Read It Later solve this by installing a small script in your browser that you can click to "read it later". Then use the iOS app to read the article at your leisure (even when offline).
- 1Password ($9.99) - I commented on 1Password in What's on your Mac. The $10 cost for the iOS app is well worth the convenience of having your usernames and passwords accessible from your devices.
- Netflix (Free) - If you're a Netflix subscriber then get this app. You know what to do with it.
iPad
- Flipboard (Free) - Flipboard is well known to all but new iOS users. Basically Flipboard incorporates your news feeds (like Google Reader), social media (like Facebook and Twitter feeds), and curated news content and presents it in a book-like interface. Next to Mail, Flipboard may very well be the second most frequently used app that I own. It even integrates with Instapaper for those times when you've found something interesting but don't have time to read it just now. What it really needs next is support for Tumblr!
- Keynote ($9.99) - Apple's presentation app. I find making presentations is easier on the iPad than on a desktop. The forthcoming iCloud integration will iron out the one remaining wrinkle of getting content to and from your iPad.
- Numbers ($9.99) - Apple's spreadsheet app thoughtfully designed for touch interfaces. This isn't just a port of a desktop app. The user interface has been redone in every detail to take into account touch interfaces.
- iAnnotate PDF ($9.99) - I'm not sure this one is worth $10 but it is a good application for not only reading PDFs (many apps do that) but also for making complex annotations like highlighting, notes, underlining, tabs and bookmarks and more. I used this app during the Executive Program to read my cases.
- ComicBookLover (Free) - I had previously loaded the Marvel and DC comic book readers but each is limited to just those publishers. CBR (and CBZ) are now the standard formats for distributing comics so why not just use a generic reader like ComicBookLover.
- Epicurious (Free) - Recipe viewer and search tool with a beautiful user interface.
- GarageBand ($4.99) - This is a fun one but I don't know if anyone is going to make any serious music with it. My youngest loves just tooling around in the app and making cool sounding song snippets.
iPhone/iPod
- Skype (Free) - It's unclear what Microsoft is going to do with Skype but for now it is a great way of making free phone calls.
- Samsung Remote (Free) - If you have a Samsung TV with a wifi or internet connection then you might want to try this remote.
- Groupon (Free) - If you are a Groupon user then get this app and stop printing your Groupon receipts.
- JotNot Scanner Pro ($1.99) - Anyone who works in an office environment has learned that the best way to take notes is to snap photos of the whiteboard, flipchart, etc. JotNot not only snaps the photo but crops out the irrelevant edges and then increases the contrast to make the photo much more readable. Well worth the $2 cost.
- Hipstamatic ($1.99) - Cool retro photos using interchangeable vintage lenses, flashes, and film.

Cases
I thought I'd throw in a special mention for some iPad cases that I've taken a shining to as well. First is the DODOcase that I have for my original iPad. Thanks to Ken Drouillard for giving me this hand-me-down after he upgraded to an iPad 2. This case never fails to get commented on once people realize that there's an iPad inside what looks like a regular black hardcover notebook. The bamboo construction is light, sturdy, beautiful and pro-eco.
 |
| DODOcase (closed) |
 |
| DODOcase (open) |
The second case I'll mention is a wooden iPad 2 case by Miniot. This gorgeous cover uses the same magnetic mechanism used by Apple's smart covers. The instant-on feature even works with it. When I eventually move on to an iPad 2 (or 3) this will likely be the cover I get. Again, a big thanks to Ken for discovering this one.
As always, if you have apps that you think are fantastic I really want to know about them. Please comment!
Tuesday, March 29, 2011
25 Random Things About Me
Twice in one day I've come across this popular meme. So I thought I'd give it a whirl and offer you 25 random things about me.
- I am husband to Annette and father to G, N, and A. They are the driving forces in my life.
- Professionally, I spend my time managing software development and technical organizations. I have a secret desire to one day return to my software developer roots.
- One day I would like to write a book. Fiction or non-fiction - it doesn't matter to me.
- I am a wild fan of Prince and own just about everything he's ever released plus a bunch of stuff he's never officially released. I feel vaguely embarrassed by this.
- I take to heart my mother's lesson that there is always at least one other way to look at every situation. And often more than one.
- I'm a Mac.
- I am a born again naturalist with Roman Catholic roots.
- For over 25 years now I have had recurring visions of dying in a large explosion. This doesn't frighten me but it does get rather repetitive.
- I have an M.Sc. in Computer Science from the University of Western Ontario. I also have a minor in Psychology.
- The Liberal Party is for me.
- My brother is developmentally handicapped and lives at home with my parents. Every time I'm with him he makes me feel like we're kids again. I love it!
- I am the prototypical geek: science fiction, comic books, table top games, gadgets, computers, toys, action figures, ...
- I think Cormac McCarthy is America's greatest gift to the world.
- I grew up with a card playing extended family. I get a rich feeling of nostalgia now whenever I play a game of cards.
- My sister flies on wings of freedom and currently seeks her fortune in PEI. I admire her so much more than she knows.
- I have a distant cousin who is an accomplished opera singer in Holland. Isn't that weird?
- Starbuck's Caffe Verona is the best way to start a day.
- I'm very proud of my kids and their diverse interests: photography and visual arts, computers, hockey, reading, film, history, fashion, ancient weaponry, chess, ...
- Charles Stross' idea of a "venture altruist" really appeals to me. If only we could pull it off for real!
- I am the author and curator of the Infocom Fan Site (in continuous operation since 1995 -- thank you UWO!).
- My father is the hardest working person I know. Why is it that our fathers always seem to work so much harder than we do? If my kids work less than me they're in big trouble!
- Philosophy and science of the human mind fascinate me.
- I'm a genius at starting projects but mostly don't follow through. This troubles me greatly.
- Single malt scotch and dark chocolate make the best bed time snack.
- I'm afraid that I'll never amount to anything important when I grow up.
Monday, January 3, 2011
Technical Resumes
I recently wrote a short series of posts on the advice I typically give when writing resumes for technical and technology leadership positions. This post serves simply as a Table of Contents.
- Part 1: Overall vision and structure
- Part 2: The Overview (aka "The most important section not to screw up")
- Part 3: The Meat and Potatoes
- Part 4: The Cover Letter
Technical Resumes: Part 4 (Cover Letter)
In the previous post I completed the description of the advice I typically give when I'm asked to review a resume. In this post, I cover a related topic: the cover letter. I was going to cover LinkedIn as well but that's a larger topic that deserves it's own space.
Cover Letter
Cover Letter
Some people spend considerable effort writing their cover letter. Having read thousands of resumes (many with cover letters attached) I'm less convinced of their value. If you've done your homework writing a concise resume with relevant content and a good Overview then a long cover letter is unnecessary. Many resume reviewers don't even open the cover letter or they shuffle it behind the resume. That said, there can be some value in a cover letter but just don't agonize over it. Spend your time on your resume and customizing the Overview.
Like the resume itself, the format of your cover letter is a matter of personal style. As always, I'm a fan of "less is more" and prefer a simple, traditional business letter layout. Let your word processing package help you with a format that appeals to you. I often use a separate font and colour for my name and contact information but everything else is in a simple, sans serif font in black "ink".
I stick to a three paragraph format. The first and last paragraphs are extremely short. The first simply states that position or positions I am applying for. The last paragraph thanks the reader for taking the time to review my qualifications and offers to meet with them to explore the possibility of a mutual fit (don't forget that you're looking for a good employer as much as they are looking for a good employee).
The middle paragraph is a little longer but I still try to keep it to maybe three sentences. I use this paragraph to draw links between the advertised position(s) and the my experience. My goal is to peak interest in my experience and maybe offer a hint at my personality. Unlike the resume, the cover letter gives you an opportunity to put on a personal face. Address the reader by name (if you know the name of the hiring manager). Use pronouns like "I". Express your excitement at the opportunity.
Finally, if you are sending a paper cover letter then always sign the paper with your signature. I prefer blue ink to set the signature apart from the black text.
Thursday, December 23, 2010
Technical Resumes: Part 3 (The Meat and Potatoes)
In the previous post I discussed the importance of a well-written, concise, relevant Overview in order to entice resume reviewers to spend more time on looking over your full credentials. In this post I make some suggestions on how to present the main body of your resume.
Recall that I recommend a four part structure for most resumes: Overview, Professional Experience, Personal Growth, and Education. Those just entering the job market might want to swap the order between Experience and Education. Those applying for very technical positions (like software developer) may want to include a fifth section summarizing their Technical Experience.
Experience
If you've done a good job at creating a brief, cleanly formatted resume with a relevant, focused Overview then the reviewer should now be eager to dig into the details of your professional experience. The purpose of this section is to describe the most relevant portions of your experience. This is not meant to be an exhaustive database of all your activities and projects. All previous comments regarding relevancy and brevity still apply.
As I mentioned in Part 1, I recommend using present tense ("deliver quality widgets") for your current position and past tense ("delivered quality widgets") for previous positions. Mixing tenses distracts the reader and interrupts flow. I also recommend avoiding the use of any pronouns. "Delivered quality widgets" rather than "I delivered..." or "we delivered...". This has a number of advantages. It sounds professional, makes the resume ever so slightly shorter, and it gives the prose a quicker pace.
The usual order to list your professional experience starts with your most recent or current position and moves backward in time. The format used is a matter of personal preference but I include the company name and position title left justified and the dates of employment right justified. I keep bullets small, monochromatic, and unobtrusive. I try to keep individual bullets to a single line of text.
Following the position heading, I usually suggest adding a single sentence that describes the position in the company (which helps in cases where non-standard titles might have been used). Following this sentence is your (typically bulleted) list of what you feel were the most important responsibilities and accomplishments in this position. Avoid all irrelevant and obvious details. For instance, if your job title was "Software Developer" then don't bother adding a bullet that states that you developed software.
Some people (even some organizations!) confuse activity with value. It might be the case that you diligently attended weekly status meetings don't include that in your resume. You want to focus on the ways you created value for the company you worked for. This means describing what you delivered and not the actions you took to deliver it. For technical positions this could mean describing the products that you contributed to building. For leaders this might mean describing the products that your team delivered. Avoid activity-centric words and phrases like "attended", "discussed", "met with", "worked on" and favour more results-oriented words like "delivered", "resolved", "created", "invented".
Newer leaders can sometimes get stuck because they still cling to definitions of value from their single contributor days. For instance, some newer leaders go through a period where they don't see their new responsibilities of leadership and organization as being as valuable as building or testing software. Remember that as a leader your sphere of influence is wider and it is quite acceptable to talk about your team's accomplishments as well as your own direct accomplishments. Maintain results-oriented language though and avoid descriptions like "Oversaw the creation of comprehensive security standards...". Hiring managers know that leaders lead teams of people that deliver different portions of a result. You don't need to include the fact that you oversaw the work. Rather focus on the deliverable: "Created comprehensive security standards...".
Finally, here are a few other common missteps that I've seen.
- Using internal project and product names and acronyms as if the reader should just know what they mean ("I worked on the XH25 component of Project Blinko").
- Describe what the company does rather than what you did.
- Include a comprehensive list of all responsibilities, accomplishments, deliverables, and activities in a long 20 bullet list. Edit!
- Put the most significant accomplishment at the end or randomly in the middle of the list. If your most significant and relevant accomplishment was the invention of a new product feature that increased sales 20% then make that the first bullet!
- Not being specific about accomplishments. "Led a team delivering client-server software" rather than "Led a team delivering 6 major software releases and 12 patch releases over a period of 18 months".
- Going into too much detail for positions in the distant pace. Focus your time on the more recent and relevant positions. Limit the descriptions to a couple bullets for the distant past and positions that are of a different nature than the one you are applying for.
Personal Growth
It is important to include a section on personal growth because it demonstrates that you are a life-long learner and have depth that goes beyond just what your work experience suggests. Personal growth accomplishments might include any of the following:
- Courses taken and completed
- Certifications
- Volunteer roles
- Sports-related roles (coaching, captain of a team, team in a competitive league)
- Speaking engagements
- Publications (although these might be attached to specific roles as well)
- Relevant hobbies ("Created and maintain the Infocom website" is relevant. "Table top gaming" is, likely, not)
- Your blog (unless your subject matter is of the nature of "nice pairs that I've seen")
Technical Experience
If you are applying for a leadership position it is less relevant what computer languages you are fluent in and what software frameworks you've used. This doesn't mean you should exclude them in your work experience but there really isn't any need to have a specific technical experience section in your resume. Spend a little more time on describing how your leadership and communication skills delivered results.
However, for technical positions you really should include technical experience. Search engines will pick up on keywords like Java, C#, and Maven. Also, the technical experience section is often used, like the overview section, to quickly filter resumes. If I'm looking for software developers with Ruby experience I'm going to want to see Ruby somewhere on the resume before I dig into the finer details. Keep the section short and neatly formated.
Recall my note regarding honesty. You want to focus on the technologies, languages, platforms, frameworks that you have real experience using. If all you know about Javascript is it's definition and what it is typically used for but you don't have any experience actually using it, then don't include it. You'll just embarrass yourself later in the interview when it becomes obvious that you've never actually worked with it.
Education
By "education" I mean formal, multi-year, focused study on a subject resulting in some kind of degree or diploma. Microsoft Certification does not qualify as education. It's training and should go in your personal growth section.
Different companies place different emphasis on education. Google, for example, places a very strong emphasis on education even if you got your degree 20 years ago. My philosophy has always been that your education demonstrates your intelligence and commitment early in your career but soon gets overshadowed by your continuous learning and professional experience. Unless you are new to the workforce, or your education ties directly into the job you are applying for, or the company to which you are applying places a high importance on education then I recommend including this section at the end of your resume.
Obviously include the school names and degree levels achieved. If you did a thesis then include its title and link to it if it is available online. Include the titles of (and links to) other academic publications you achieved in your studies.
I'm hesitant to recommend including education that was started but not completed. It suggests a lack of discipline or capability. If you started a degree but had good reason to not complete it (perhaps a business or job opportunity came up) then by all means include the fact that you did 3 years of a 4 year degree but then also include your reason for not completing.
So that basically covers that I typically advise when people ask me to review their resume. I'm going write one more post tomorrow that covers the related topic of the Cover Letter and I might include a couple of thoughts on LinkedIn.
Wednesday, December 22, 2010
Technical Resumes: Part 2 (The Overview)
In yesterday's post I kicked off my resume writing advice for technical and technology leadership positions. Today's post continues on that theme and I cover what I consider to be the most critical and most overlooked part of the resume: The Overview.
Overview is to Resume as Resume is to Interview. Hiring managers have many constraints on their time and are not waiting around for your resume to hit their desk. It is not unusual for hiring managers to blast through a 12 inch thick stack of resumes in 60 to 90 minutes making gut reaction decisions on which candidates seem the most promising. When I sort resumes I create two piles: Interested and TBNT (Thanks, But No Thanks). After my initial sort the Interested pile is typically about 10% of the original stack size. This is the pile that I spend my time on and really consider who I would like to interview.
Spending 30 seconds on one resume while doing this initial sort is the absolute maximum. Typically a decision is made in less than 10 seconds. There are a handful of surface factors that cause resumes to be dumped into TBNT: excessive length, obvious spelling errors, or anything that makes the resume look like it will be difficult to work through (poor layout, goofy font choices, dark paper -- why print black text on dark coloured paper?). However, most of the filtering comes from the Overview section of a resume. The primary goal of the Overview section is to convince the reviewer that they should continue to read the rest of your resume, search for you on LinkedIn and otherwise spend timing learning about you.
Spending 30 seconds on one resume while doing this initial sort is the absolute maximum. Typically a decision is made in less than 10 seconds. There are a handful of surface factors that cause resumes to be dumped into TBNT: excessive length, obvious spelling errors, or anything that makes the resume look like it will be difficult to work through (poor layout, goofy font choices, dark paper -- why print black text on dark coloured paper?). However, most of the filtering comes from the Overview section of a resume. The primary goal of the Overview section is to convince the reviewer that they should continue to read the rest of your resume, search for you on LinkedIn and otherwise spend timing learning about you.
I've seen resumes include an Objectives section (rather than an Overview) where the candidate describes what their career objectives are. To be honest, I don't know you and I don't yet care what your objectives are -- TBNT (or at least ignore this section). I've read other resumes that include a mini-resume in their Overview. This kind of Overview doesn't say anything new or interesting that I can't get from the rest of the resume and is typically consists of long lists of comma separated skills and technologies. Way too long and boring to hold my attention -- TBNT. Still others include all boiler-plate. Let me fill you in on a secret, there are literally thousands of people who "have excellent communication skills" and "are dynamic leaders" and "put great attention to detail" -- TBNT. Still others don't include an Overview section at all. The reviewers challenge then becomes figuring out where to cast their eyes for the next 10-30 seconds in order to determine if there is enough value in doing a deeper read. Couple this with an overly long resume and you're on the top of the TBNT pile.
Imagine you have 30 seconds to convince The Donald that you have a compelling business idea or Brian Eno that U2 should be opening for your band or Spielberg that you've written a blockbuster. In all these cases you need to know what Trump/Eno/Spielberg are interested in and what they find valuable. The same goes for your Overview. If you have a boilerplate Overview that doesn't take into account the specific position let alone the specific company then you're 10 seconds away from TBNT.
You mean I have to write an Overview for every job that I'm applying for? Yes, but it's not as bad as it sounds. Chances are you have a core set of skills and interests and you are applying for similar positions at companies in related industries. Still, there is a huge difference between what is required for a Senior Software Designer vs a Software Team Leader.
To start off I recommend writing a longer and broader Overview that captures many of your technical and non-technical skills, experiences and traits. This might sound counter to everything I've written so far but you will NOT use this version on any actual resume. Think of this as your diamond mine out of which you will extract gems for each resume. You will edit this über-Overview down to just what is needed for each position/company to which you are applying. Editing down is much easier than trying to come up with new material for each resume.
Once you are ready to write an Overview for a particular resume put yourself in the shoes of the business owner or hiring manager for that company and think about how you would fill that position. Imagine that you have dozens or hundreds of highly skilled candidates to choose from so you can be picky. What experience, skills, knowledge would you be looking for to fill the position? What would your dream candidate look like? If you're having trouble do a little research on the web. Google and LinkedIn can be great resources to get to know more about a company or about a type of position. Now consider your experience, skills and knowledge and pick out a couple of experiences or unique skills that you think best match your vision for this position. Be specific and call out (briefly!) experiences that you think would make you the top candidate for this position.
Once you have a draft Overview consisting of maybe 3 to 5 sentences (no more than 6 to 8 lines of text) read it over again deleting everything that you feel takes away from the core message you are trying to deliver. Be brutal in your editing. Slash irrelevant details, boilerplate, and duplication. Even eradicate unnecessary words (particularly adjectives) and superfluous punctuation. Get this section down to its very essence in order to minimize the time it takes a reviewer to decide to give your resume a deeper read. This is your first impression and you want it to be positive. Keep it relevant, keep it specific, keep it brief. Your goal is to illicit a reaction like "hey that's cool" or even "hmmm, that's interesting". All you want at this point is for the reviewer to be compelled to invest time in the rest of your resume.
A word about honesty. Sometimes getting into the mind of the hiring manager gets your creative juices flowing and after you've written your Overview you realize that you've described someone else. At that point you need to either rewrite the section using your actual experience (maybe you're 80% qualified for the position) or admit that maybe you're not the right person for this position after all. Nothing will irk a hiring manager more than being lied to and having their time wasted. At best you'll be on permanent TBNT from that department but you might also end up on the black list for the whole company or even a whole industry.
Once you have a draft Overview consisting of maybe 3 to 5 sentences (no more than 6 to 8 lines of text) read it over again deleting everything that you feel takes away from the core message you are trying to deliver. Be brutal in your editing. Slash irrelevant details, boilerplate, and duplication. Even eradicate unnecessary words (particularly adjectives) and superfluous punctuation. Get this section down to its very essence in order to minimize the time it takes a reviewer to decide to give your resume a deeper read. This is your first impression and you want it to be positive. Keep it relevant, keep it specific, keep it brief. Your goal is to illicit a reaction like "hey that's cool" or even "hmmm, that's interesting". All you want at this point is for the reviewer to be compelled to invest time in the rest of your resume.
A word about honesty. Sometimes getting into the mind of the hiring manager gets your creative juices flowing and after you've written your Overview you realize that you've described someone else. At that point you need to either rewrite the section using your actual experience (maybe you're 80% qualified for the position) or admit that maybe you're not the right person for this position after all. Nothing will irk a hiring manager more than being lied to and having their time wasted. At best you'll be on permanent TBNT from that department but you might also end up on the black list for the whole company or even a whole industry.
Next Up: The Meat and Potatoes
Tuesday, December 21, 2010
Technical Resumes: Part 1
Over the years in my roles as manager, director, and technical executive I frequently had to review resumes and qualifications of candidates applying for technical and leadership positions. I also get asked fairly frequently (maybe once a month) to cast a critical eye on the resumes of coworkers, former coworkers, friends of coworkers, etc. While I enjoy doing this it does take some time to do well. What I've included in this post and in the upcoming posts is the core set of principles that I use to guide my review of resumes for technical and technology leadership positions.
The Goal
Ask yourself why you are writing a resume at all. If your answer was "to summarize my experience" or even "to get a job" then think again. Your resume has exactly one purpose -- to get you an interview with an employer that you are interested in working for.
Some people think of their resume as a database or catalog of their experiences. They feel that a short resume reflects a lack of experience and so they make it as long and detailed as possible. Others think of their resume as some kind of sounding board for their opinions and ideas. These resumes are like that guy at the party who doesn't clue in that people don't care about his latest World of Warcraft exploits. Others think of their resume only as a compliance activity that needs to be checked off the list in order to say that you've applied for a position. These people send identical copies of their resume to hundreds of potential employers hoping that one of them will notice something valuable to them.
So if the goal of your resume is to get yourself an interview then what you need to be focused on is how to catch the attention of the person or persons who are sifting through hundreds of resumes of people with similar qualifications to your own. Think of your resume as a marketing teaser. You've got one chance to get a hiring manager or recruiter to want to get you in for an interview. You want your resume placed in the To Interview pile and not in the TBNT ("Thanks, But No Thanks") pile.
Overall Structure
Keep it short (yes, you've heard this before but I really mean it this time). It should fit on one double-sided sheet of 8.5x11" paper (although I recommend using two single-sided sheets if you really need to print it out). The problem with the "resume-as-database" folks is that the length of the resume becomes too daunting for reviewers and usually hits the TBNT pile.
The actual format of the header information at the top is a matter of subjective choice and can reflect your own design sensibility -- but keep it simple and to the point. Your name and how to contact you. Both via email and telephone -- for now keep your social media off your resume unless it is relevant to the position.
For senior or leadership positions I typically recommend a four part structure: Overview, Experience, Growth, Education (in that order). If you're a new grad then put the Education section second after the Overview. For technical positions, include a fifth section that summarizes the technologies that you feel you have expert experience in (and no, Word and Excel does not constitute "technical").
Appearance
Like the header, the layout of the resume is largely subjective. I do suggest that you resist any urge to experiment with all those fonts that you never get a chance to use. Sans Serif fonts like Helvetica, Arial, and Futura were designed to ease eye strain. Furthermore, you don't want your font choice to become your message -- you want your qualifications to be your message.
Bullet points are another area that some people feel necessary to "accessorize". Small, round, monotone bullets in the same colour as your text are quite sufficient. And don't go crazy with the bullets. I've seen entire resumes formatted in bullet form. They read like the parts list in an appendix of the Owner's Manual for my car. TBNT.
Spelling and Grammar
It would amaze you, gentle reader, to learn how many resumes in this day and age still contain spelling errors. It's not enough that every word processor includes a spell check function but most of them will even underline the misspellings in red as you type them. Nothing says, "low effort compliance activity" than a resume with spelling errors. TBNT.
Obviously grammatically correct sentences are just as important as correctly spelled words. Prefer the active voice ("delivered the project") over passive ("the project was delivered"). Microsoft Word has a hate-on for passive voice so it should prove a useful ally.
One area that I find very often gets overlooked is verb tense. I've read present progressive, past tense, and present tense all in a single resume. Changing tenses interrupts flow and distracts the reviewer. If I'm describing my current position I use plain old present tense: "Lead a team", "deliver solutions", "work with". For past positions and experience I use plain old past tense: "Led a team", "delivered solutions", "worked with". You may choose to use all past tense but whatever you decide stay consistent.
Remember Your Reader
While you might consider the Frobozz System that you helped build while at GrueTech, Inc. to be of earth-shattering importance it is very likely that the reviewers of your resume will have never heard of it. Put yourself in the shoes of someone who has never worked where you worked and then read your resume. How many assumptions did you build into it? Unless your customer base was counted in the tens of millions or higher, don't assume that the products, services and processes of your former employers are self-evident. Spell out company-specific acronyms, define custom terms, and include hyperlinks to relevant content should the reviewer wish to dig deeper.
Next Up: The Most Important Section of Any Resume
The Goal
Ask yourself why you are writing a resume at all. If your answer was "to summarize my experience" or even "to get a job" then think again. Your resume has exactly one purpose -- to get you an interview with an employer that you are interested in working for.
Some people think of their resume as a database or catalog of their experiences. They feel that a short resume reflects a lack of experience and so they make it as long and detailed as possible. Others think of their resume as some kind of sounding board for their opinions and ideas. These resumes are like that guy at the party who doesn't clue in that people don't care about his latest World of Warcraft exploits. Others think of their resume only as a compliance activity that needs to be checked off the list in order to say that you've applied for a position. These people send identical copies of their resume to hundreds of potential employers hoping that one of them will notice something valuable to them.
So if the goal of your resume is to get yourself an interview then what you need to be focused on is how to catch the attention of the person or persons who are sifting through hundreds of resumes of people with similar qualifications to your own. Think of your resume as a marketing teaser. You've got one chance to get a hiring manager or recruiter to want to get you in for an interview. You want your resume placed in the To Interview pile and not in the TBNT ("Thanks, But No Thanks") pile.
Overall Structure
Keep it short (yes, you've heard this before but I really mean it this time). It should fit on one double-sided sheet of 8.5x11" paper (although I recommend using two single-sided sheets if you really need to print it out). The problem with the "resume-as-database" folks is that the length of the resume becomes too daunting for reviewers and usually hits the TBNT pile.
The actual format of the header information at the top is a matter of subjective choice and can reflect your own design sensibility -- but keep it simple and to the point. Your name and how to contact you. Both via email and telephone -- for now keep your social media off your resume unless it is relevant to the position.
For senior or leadership positions I typically recommend a four part structure: Overview, Experience, Growth, Education (in that order). If you're a new grad then put the Education section second after the Overview. For technical positions, include a fifth section that summarizes the technologies that you feel you have expert experience in (and no, Word and Excel does not constitute "technical").
Appearance
Like the header, the layout of the resume is largely subjective. I do suggest that you resist any urge to experiment with all those fonts that you never get a chance to use. Sans Serif fonts like Helvetica, Arial, and Futura were designed to ease eye strain. Furthermore, you don't want your font choice to become your message -- you want your qualifications to be your message.
Bullet points are another area that some people feel necessary to "accessorize". Small, round, monotone bullets in the same colour as your text are quite sufficient. And don't go crazy with the bullets. I've seen entire resumes formatted in bullet form. They read like the parts list in an appendix of the Owner's Manual for my car. TBNT.
Spelling and Grammar
It would amaze you, gentle reader, to learn how many resumes in this day and age still contain spelling errors. It's not enough that every word processor includes a spell check function but most of them will even underline the misspellings in red as you type them. Nothing says, "low effort compliance activity" than a resume with spelling errors. TBNT.
Obviously grammatically correct sentences are just as important as correctly spelled words. Prefer the active voice ("delivered the project") over passive ("the project was delivered"). Microsoft Word has a hate-on for passive voice so it should prove a useful ally.
One area that I find very often gets overlooked is verb tense. I've read present progressive, past tense, and present tense all in a single resume. Changing tenses interrupts flow and distracts the reviewer. If I'm describing my current position I use plain old present tense: "Lead a team", "deliver solutions", "work with". For past positions and experience I use plain old past tense: "Led a team", "delivered solutions", "worked with". You may choose to use all past tense but whatever you decide stay consistent.
Remember Your Reader
While you might consider the Frobozz System that you helped build while at GrueTech, Inc. to be of earth-shattering importance it is very likely that the reviewers of your resume will have never heard of it. Put yourself in the shoes of someone who has never worked where you worked and then read your resume. How many assumptions did you build into it? Unless your customer base was counted in the tens of millions or higher, don't assume that the products, services and processes of your former employers are self-evident. Spell out company-specific acronyms, define custom terms, and include hyperlinks to relevant content should the reviewer wish to dig deeper.
Next Up: The Most Important Section of Any Resume
Saturday, October 9, 2010
Review: Watts
Recently, I asked "What's On Your Mac?". To extend my list, let me introduce you to Watts, a terrific little battery meter for the menu bar. To say that Watts is a more attractive menu meter than the one built into Snow Leopard is to just scratch the surface. In addition to doing the obvious, Watts includes some other essential features that, frankly, OS/X really should provide as part of good battery maintenance.
One feature that I really like is that Watts will keep track of how often you calibrate your battery. Macbook batteries are great and you will get even better performance out of them if you periodically calibrate them. This involves fully charging, discharging, and recharing the battery. You can google "macbook battery calibrate" and find the instructions to do so. It takes about a half day to run the half dozen calibration steps but I often find that I get so busy that I forget about continuing the calibration steps and have to start again. Watts will step you through the process and remind you when it is time to move on to the next step. Another cool and related feature is that Watts will remind you to periodically unplug your laptop (which is also good healthy practice for your battery). These features plus the useful notification options and battery health information screens make this little application well worth the $8. Check it out.
Update: Breaking Free
Recently I wrote about breaking free of MobileMe and of Firefox (which has been seriously lagging in performance and features). Well, I've managed to do both.
First off, the iOS 4.2 Beta2 has released me from the grips of MobileMe. I can now have multiple Exchange calendars (the last thing holding me back). True, I am missing the ability to locate my iPhone, iPod, iPad using MobileMe but, frankly, that's $119 worth of insurance that I don't need. Everything other feature of MobileMe can be found on Google and other similar services. Until Apple either makes MobileMe more compelling or cheaper (i.e. free) I can't see myself heading back into Apple's warm embrace (at least not for cloud services).
Second off, I'm now 100% Chrome instead of Firefox. I've found extensions for 1Password (beta), AdBlock, Evernote Clipper, Forecastfox Weather (which takes up less interface space than on Firefox). I've given up on mouse gestures primarily because I do most of my browsing on my iPad or Macbook anyway. I'm really enjoying the speed and reliability of Chrome. Nothing comes close.
First off, the iOS 4.2 Beta2 has released me from the grips of MobileMe. I can now have multiple Exchange calendars (the last thing holding me back). True, I am missing the ability to locate my iPhone, iPod, iPad using MobileMe but, frankly, that's $119 worth of insurance that I don't need. Everything other feature of MobileMe can be found on Google and other similar services. Until Apple either makes MobileMe more compelling or cheaper (i.e. free) I can't see myself heading back into Apple's warm embrace (at least not for cloud services).
Second off, I'm now 100% Chrome instead of Firefox. I've found extensions for 1Password (beta), AdBlock, Evernote Clipper, Forecastfox Weather (which takes up less interface space than on Firefox). I've given up on mouse gestures primarily because I do most of my browsing on my iPad or Macbook anyway. I'm really enjoying the speed and reliability of Chrome. Nothing comes close.
Subscribe to:
Posts (Atom)